Maybe you just bought a home, have lived in your home for many years, or something just caught your eye about a friend’s house, but you see a problem in the countertops. Yes, a gap between the wall and the edge of the countertop…small but noticeable, and now you can’t un-see it.
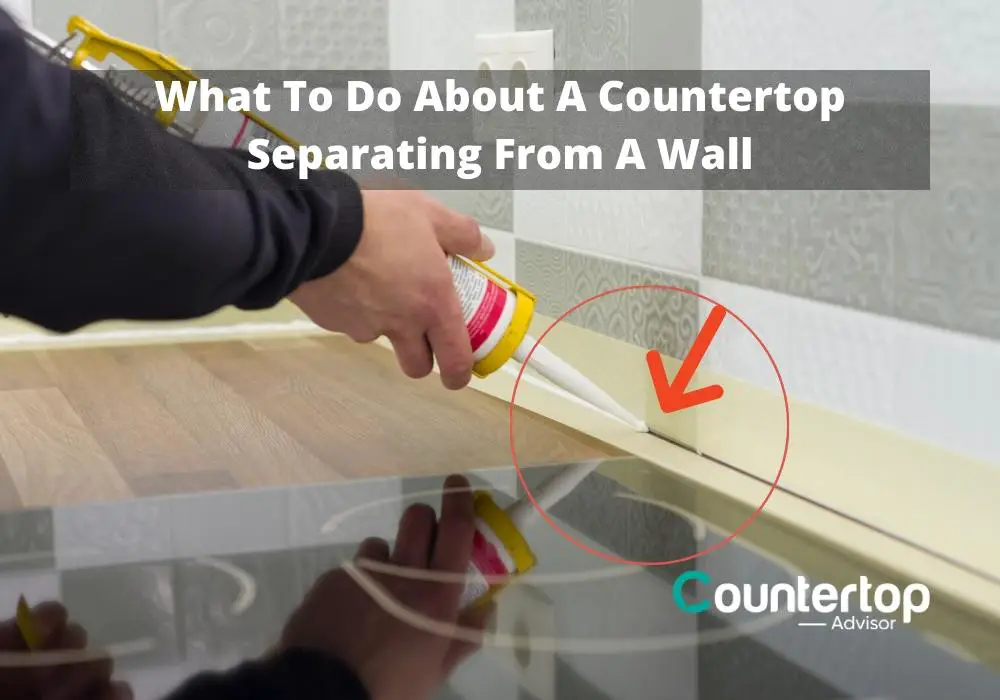
Now, this happens quite a bit, but how do you fix a countertop that has separated from a wall? You can start off by caulking the separated area and letting it reattach to the wall with the caulk.
Countertops separating from the wall to which they are connected is quite simply an eyesore. No one wants to see their kitchen countertop or bathroom countertop with a noticeable gap between it and the wall.
Unfortunately, though, this is a common occurrence. Like any other home project, there are many ways you may desire to go about tackling the issue, and many things to consider as well.
What Causes a Countertop to Separate from the Wall?
When a gap breaks out between a countertop and the wall, there are innumerable ways that this could’ve occurred.
- Improper Installation: One likely culprit is the improper installation of the unit itself. When a countertop unit is installed, you want to ensure that whoever is installing (or has installed) the unit has done so correctly. If the unit is improperly installed, you run the risk of having a gap exposed. The countertop should be attached to the cabinet using the proper attachment process.
- Imperfections of the Countertop: Another reason that a gap may develop between your countertop and the wall is due to the imperfections of the countertop. This can depend on the type of countertop you have. For example, if it is a laminate, certain areas may develop bulges and lapses due to moist areas, such as the countertop area around the sink. If the countertop is granite, imperfections in the sheet may prevent the entire countertop from fitting in an exact line against the wall.
- House Settling: As the house ages, it settles into the foundation on which it was constructed. As a house settles, it makes slight movements and adjustments according to the plot of land on which it sits. Sometimes walls shift in their positioning, allowing more movement in the home’s structure itself. The walls shifting can sometimes cause the countertop and wall to split away, thus creating a small gap.
- Weight of Cabinets: Sometimes the added pressure and weight of cabinets above the countertop can cause movement in the countertops and cause them to jut slightly away from the wall, again creating a gap.
- Shinkage: Movement and shrinkage in the floor can also cause movement in the countertop to create noticeable space.
How to Avoid a Gap
To avoid a gap from occurring between your counter and wall, you can, in fact, take small precautions to slow down or stop the eventual onset.
For one, if you know that you have a perfectly cut countertop that is going to be installed on a crooked wall, you need to save yourself time and effort and have the countertop adjusted.
Now, this may be expensive, but it will save you time, effort, and money from having to fix that annoying gap.
If you notice that you have floor movement, you can prevent the eventual movement in your countertops from becoming noticeable by tweaking the jack posts (which are powerful, steel columns typically in the basement that extend from ceiling to floor and support the home) so that they are resisting any movement.
The jack posts support the main beam of the house, upon which the rest sits. If you are able to tweak the jack posts to revert to their initial position, then you’ll likely avoid movement in the floors and walls that can cause a gap between the wall and countertop. (Source: Winnipeg Free Press Homes).
Fixing and Closing Larger Gaps
Now, in this case, you are going to go about attempting to reattach the cabinet and thereby the countertop firmly against the wall if feasible.
Step 1: Remove the Screws
When beginning to tackle the issue, you’ll need to figure out where the screws are that attach the cabinet to the wall. Typically, these are located inside the cabinet and toward the top of the unit.
There should be two to three or more screws nailed through the back of the countertop and into the wall. Another tip for finding these screws: they are usually driven through the reinforcement strip of wood that supports the countertop’s backend.
Now, you need to remove these screws from the cabinet, typically using a drill and a No. 2 Phillips bit.
Step 2: Pushing the Cabinet Closer to the Wall
You should then insert a flat bar or pry under the toe kick of the cabinet to then pry the front of the cabinet unit. This action will force the countertop to slide closer to the wall.
If you aren’t able to raise the front much, that’s normal. However, you should get small wooden shims around a half-inch thick. Now, you can use these shims and place them under the toe kick of the cabinet to keep it in an elevated situation.
Step 3: Finish the Job!
Now, you can take screws and drive them into new holes you will create through the process. Push them into the wall as far as they’ll go, but beware to avoid tightening them too much.
Once you’ve finished fastening the screws, check the wooden shims to see if they have moved or are loose at all. It is possible that they’ll be loose because when you tightened the screws, the cabinets might have shifted slightly upward.
If the shims are at all loose, you should replace them with pieces that are slightly thicker. You’ll have to fasten these into position by lightly hammering them in.
Fixing the Gap With Caulk
After the installation of any vanity or floor cabinet, you may notice a small gap between the countertop and the wall, and, truthfully, a gap is very likely after installation.
You can attempt to get the cabinet, vanity, or countertop as close to the wall as possible to render the gap unnoticeable, but changes in the structure of the home or the cabinet could cause a separation between the two, making a gap.
Many times, the alignment of the wall is not perfect, which will make it difficult to perfectly set a countertop against the wall without any hint of a gap. The likelihood of wall misalignment is much higher in older homes whose floors have settled and sagged and succumbed to heightened moisture.
Sometimes, with wall misalignment, the gap width of your countertop separation can change all up and down the point of contact.
To fix this issue, you can either caulk the area or consider adding trimming to hide the gap.
It is important for you to recognize, though, that gaps close to half an inch thick are not going to be fixable with caulking. You generally cannot fill these gaps with caulk and should consider using the trim option instead.
Anyway, first, you can try closing the gap if possible.
How to Caulk and What to Do
Now if the gap is or you can reduce it to be less than a fourth of an inch, you can fill it with caulk. If the gap happens to be larger than that, you can purchase some backer rod and stuff that in the gap first.
The backer rod is the foam insulation that helps maintain the caulk’s position and also serves to prevent the caulk from sinking, caving in, and creating crevices and holes.
In some cases, you’ll want to use the caulk and backer rod after having gone through the process of unscrewing the cabinet, shimming it, and forcing it back in.
There’s also another option before you officially start your caulking procedure. You could close the gap with a putty knife to stuff the area and avoid having to remove and move the cabinet closer.
The Caulking Process
Now you’re ready and have the tools to start applying the caulk. Here are some steps to follow as you go about the procedure:
- You’ll need to start by applying painter’s tape along the edge of the countertop. You’ll also have to apply the tape to the wall just above the gap to ensure that you keep caulk off both the wall and the countertop. You want to make sure that the areas to which you’ve attached the painter’s tape are exactly where the countertop and wall would meet if they were touching.
- Now you can apply your caulk with a caulking gun. You’ll want to make sure that you choose a color of caulk that matches or mimics the color of the countertop. Then, as you apply the caulk, take care to spread a thin and contiguous line of caulk without any breaks to ensure the best results.
- Now you are going to “tool” your caulk. While there are many actual tools you can use for this process, most homeowners elect to use either a lubricated finger or lubricated, backend of a plastic spoon. To tool the caulk, you have to draw your finger across the line of caulk you’ve applied with minimal pressure. Doing this will create a concave surface along the line of caulk. To maintain lubrication on either your finger or plastic spoon (or whatever else you choose for this process) keep a bowl of soapy water near you.
- Then, you’ll want to carefully remove the tape from the areas you’ve applied it to before the caulk finally sets in its position.
If You Choose, There’s Always Trim
Sometimes the gap between the countertop and the wall will be too large to remedy easily with the caulking method or simply jamming the cabinet back into place.
In this case, it may be easier for you if you choose to cover the gap with trim.
You’ll have a variety of trim options if you decide to go down this route. More common selections for this specific issue are among quarter-round trim and cove molding or a rectangular 1X2 inch material.
Then, you’ll have different methods for applying the trim you’ve selected to the area to then hide the gap. In general, here are some easy tips for you to follow to aid you in your efforts:
- Glue the molding to either the countertop or wall. You’ll have to do this with a thin layer of adhesive, preferably construction adhesive. You’ll want to shy away from using nails as a method of attaching the trim to the wall as it could either damage the countertop or backsplash.
- You could also caulk either end of the trim with an acrylic or latex caulk and then place the trim exactly on the wall where you desire it.
- You could also apply a coat of paint (you’ll only need to apply one) or finish after the caulk has set
- You could also prime or seal the molding after you’ve cut it and finished it. You’ll need to do this before you officially install the trim at any rate. (Source: Hunker)
What is the Difference Between Acrylic and Latex Caulk?
Well, as with anything, and especially with home repairs, there are nuances to the types of products you can consult. In this case, if you are attempting to remedy a gap between your countertop and the wall, you may want to use caulk.
There are two different types of caulk you may be so inclined to use: acrylic and latex. But, what exactly is the difference or the benefit between using one or the other? Well, in fact, there are even more possibilities than you might’ve supposed.
Let’s take a look (source: the Spruce):
- Acrylic Latex Caulk: General use caulks which dry quickly. They can be used in a variety of places for many reasons and are paintable. Acrylic latex caulk is commonly used to fill small gaps or holes in wood furnishings or trim. It is best to use this caulk in dry areas.
- Latex/Acrylic Caulk with Silicone: Allows more malleability, flexibility, and durability. It can expose to water as it is water-resistant. “Tub and tile” caulk.
- Pure Silicone Caulk: Great for areas with a higher risk of water exposure; also mildew-resistant. These caulks have a longer lifespan. Great sealant around sinks.
- Butyl Rubber Caulk: Primarily used for outdoor areas. Great for use as a sealant for shifty, outdoor areas made of metal such as gutters.
- Refractory Caulk: Caulk used in high-temperature settings.
- Masonry Repair Caulk: Great for sealing gaps and cracks, especially useful in driveways or stucco walls.
So, Which Caulk Is the Best for Countertops?
If your countertops are granite, then many agree that the best type of caulk to use a pure silicone caulk.
This allows for a finer finish that blends with a granite surface of any variety. Even further, though, the silicone caulk will be beneficial for the section of the countertop by the sink, as it is likely this area will be exposed to water. (source: NATCO)
If, however, you have a laminate countertop, you will likely be able to use the same type of caulk as you would on any countertop. Meaning, truly, a latex acrylic caulk or a silicone caulk will complete the job for you.
You’ll want to gauge your use of caulk on the type of finished product you hope to see from your caulking procedure.
Furthermore, if you wish to ensure that you will have no problems with moisture or water damage, then perhaps a silicone caulk is your best bet, as you’ll benefit from the best water resistance for an indoor caulking substance.
Should I Even Bother Fixing the Gap?
The easy answer? It depends.
How large is this gap? Is it noticeable? Is it going to bother the aesthetic balance of your kitchen?
Now, more importantly, is there any chance of moisture leeching into the gap?
If moisture were to leech behind the gap, this could get tricky. You may find yourself noticing that the gap has grown at that point.
The additional moisture can certainly cause even more growth in the gap, as it can cause movement and growth.
The extra moisture can also be dangerous, as it can become a breeding ground for mildew.
Now, the real answer? Yes, you should fill the gap. And filling or fixing some gaps is much easier than others; however, you don’t want to have a small issue of a gap, ignore it, and some time down the line be dealing with a mildew issue.
Instead, you should save yourself money now, and fix the issue now.
So, now you have the tools to go out there and tackle the project that has plagued your mind for however long (or maybe now you’ll just have the tools to fix the problem if it ever arises).
From your kitchen to your bathroom, you’ll have the ability to make sure any gap that happens to come out of nowhere will not stay there and not serve as an eyesore for you to deal with for however long.