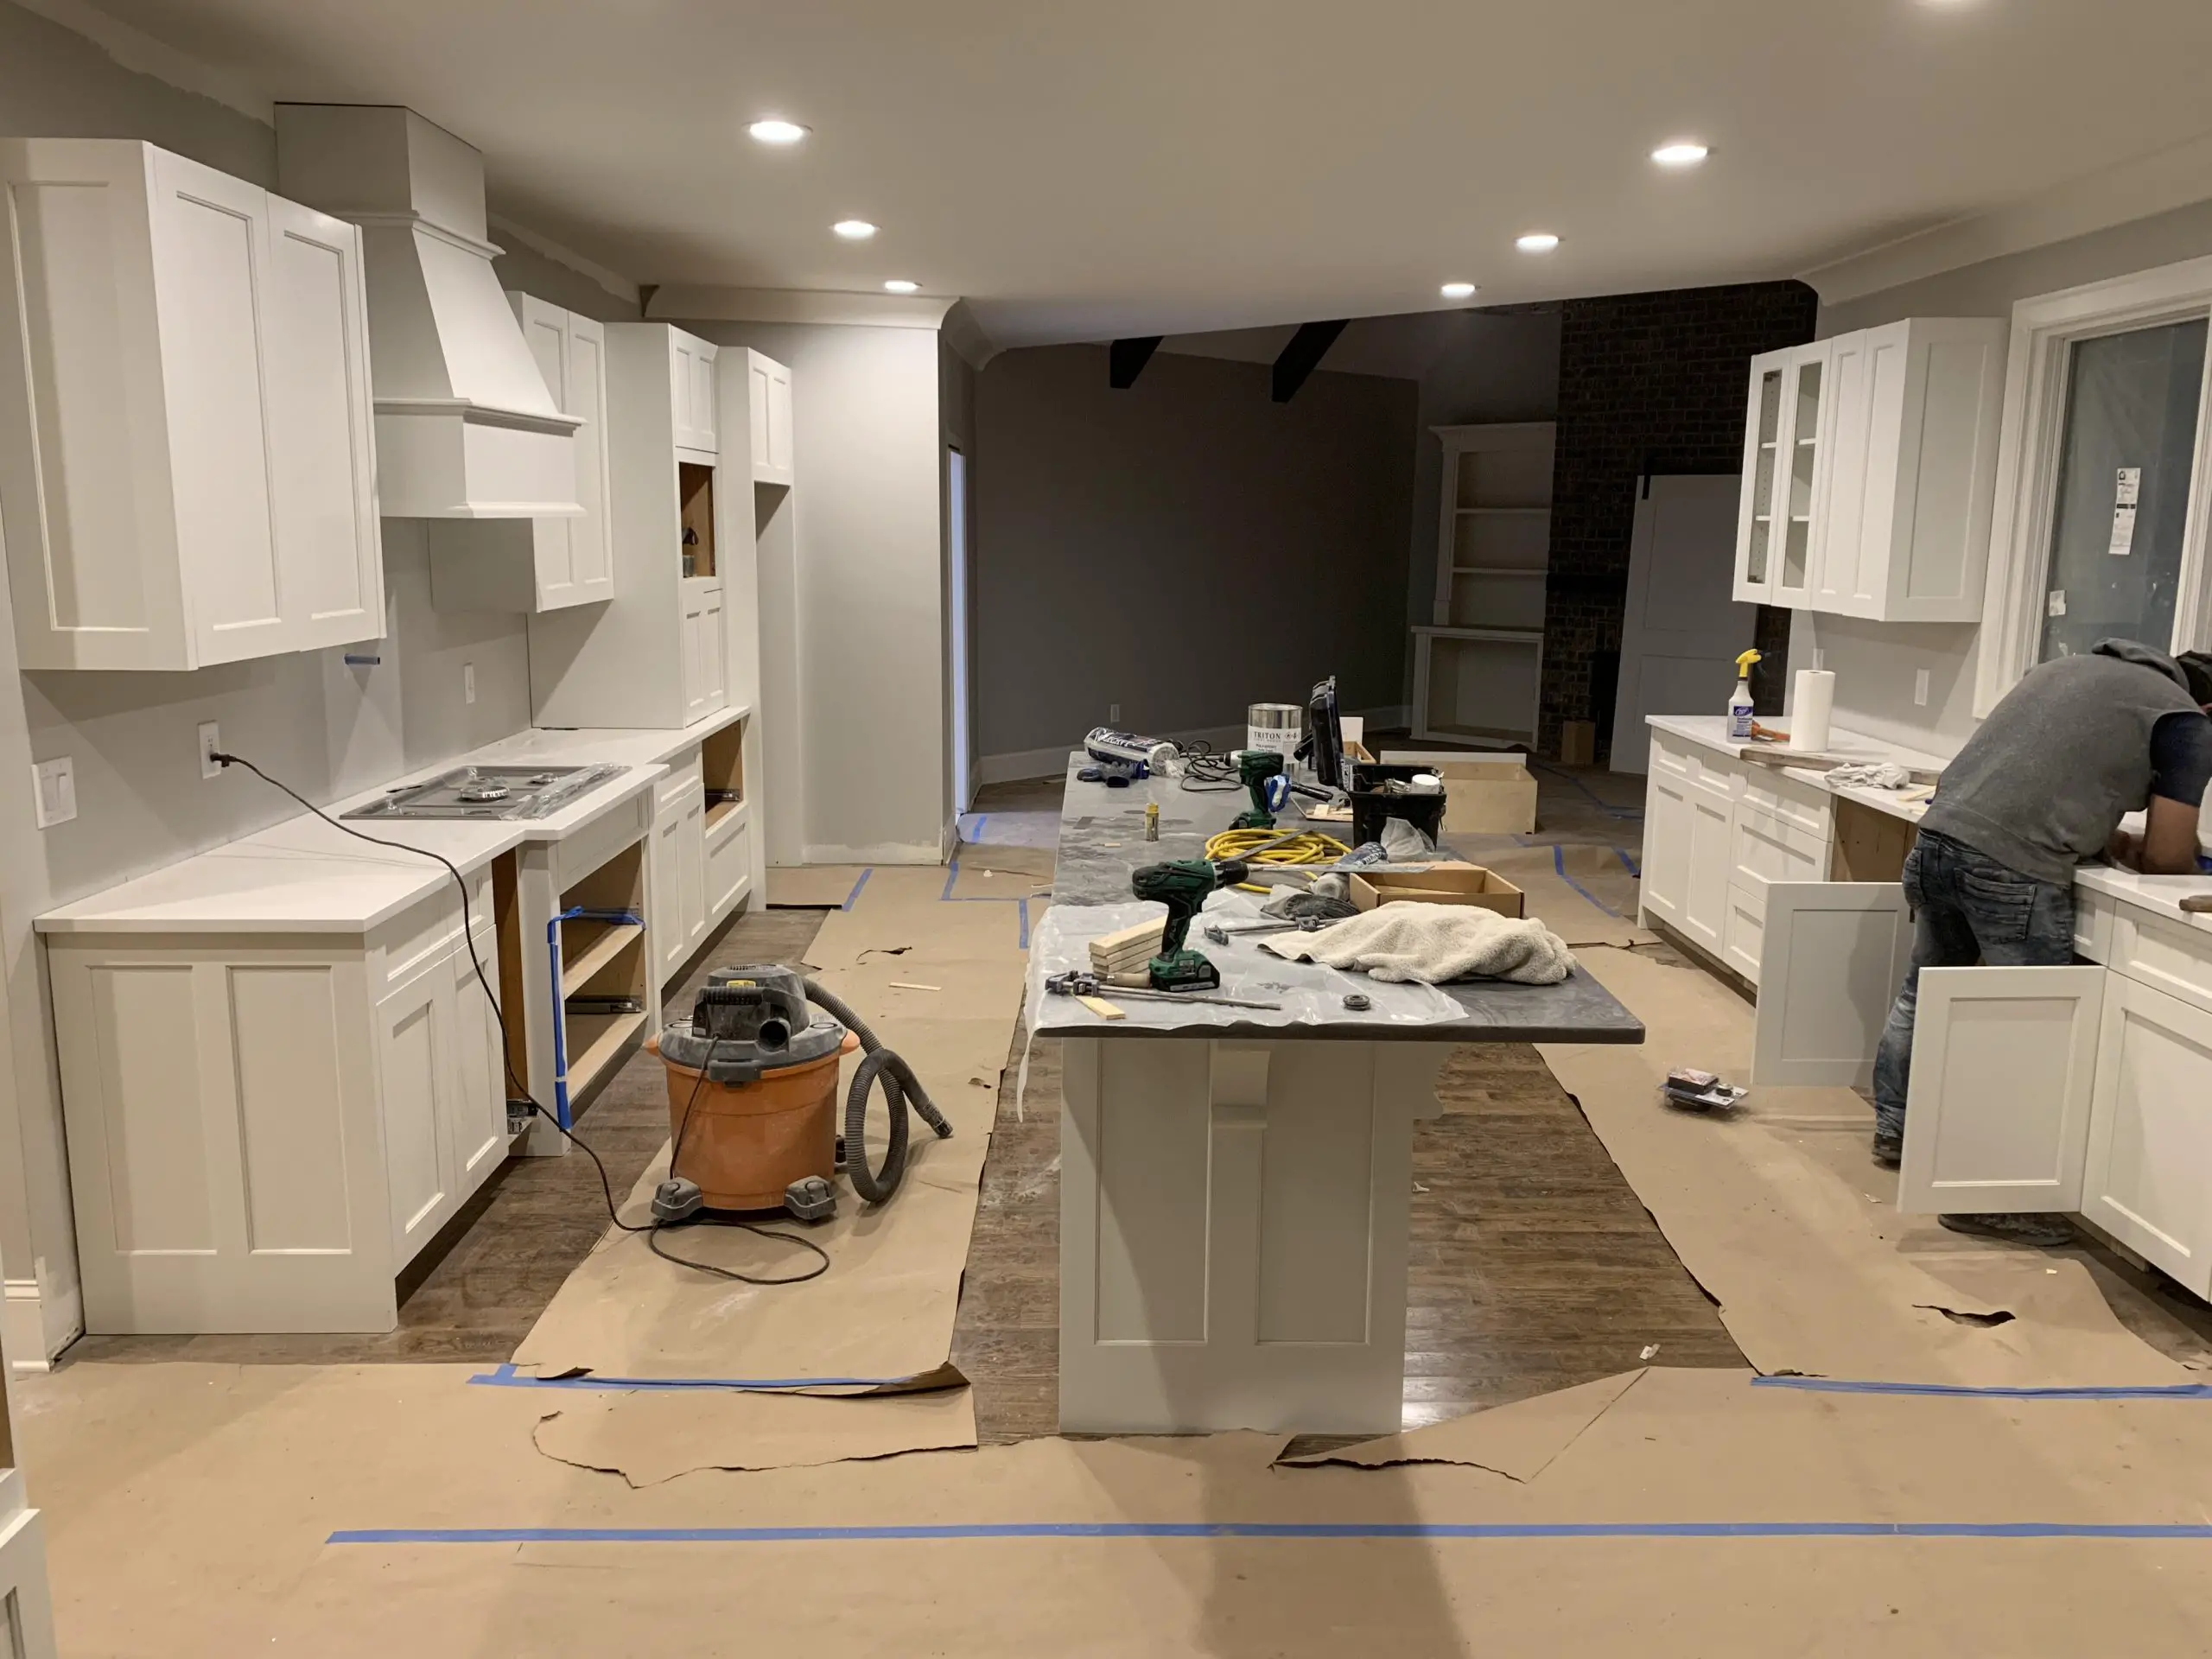
Kitchen countertops are installed in a specific way to ensure quality and safety. It is important to understand the process of each process for each countertop material. Kitchen countertop installation is not an easy job. It takes a professional to get the job done and done right.
Kitchen Countertop Installation
Installing natural stone or quartz countertops requires a ton of knowledge and experience. It is essential to know the process so that when you have countertops installed in your home, you know what to expect and what should and shouldn’t be happening.
Kitchen Countertop Installation Process & Standards
- Countertops Arrive – Your countertops will arrive either on a truck or trailer. Many companies use different transport methods. One aspect that remains the same is the way the countertops are stored for transportation. They must remain in an upright position and never laid flat. Countertops can be laid flat to make cuts but must be done professionally. Most granite companies will transport your countertops with an a frame made of either metal or wood. Metal is of course the best way to transport but wood can get the job done. Most quality providers will have invested in a metal a frame but that doesn’t necessarily mean they aren’t quality if they use a wood a frame.
- Old Countertops Tear Out – your old countertops will be torn out by removing screws from underneath. This is done by removing each section separately and carefully. It will speed up the process if you remove all drawers and contents in the base cabinets. It will also help prevent dust and other mess from getting into your drawers and kitchenware.
- Plumbing – Be sure to remove all plumbing lines. This is not usually something an installer can do by law. If they are a licensed plumber, then this is nothing to worry about.
- Countertop Pieces Are Brought In – Each piece of your kitchen countertop is now brought in and placed on your bare cabinets. This process usually is a very strenuous process so please make sure that there is a clear and direct path to your kitchen. One small trip can delay the installation of your countertops and could also cause damage to your home.
- Walls – Sometimes during installation, you will see the installer placing a granite piece or getting measurements to cut your wall some to allow for more room when placing pieces. This is especially important when you have a wall-to-wall countertop. Completing this step will ensure a better-quality installation and will have no effect on your walls. Don’t be alarmed as this is perfectly okay to do.
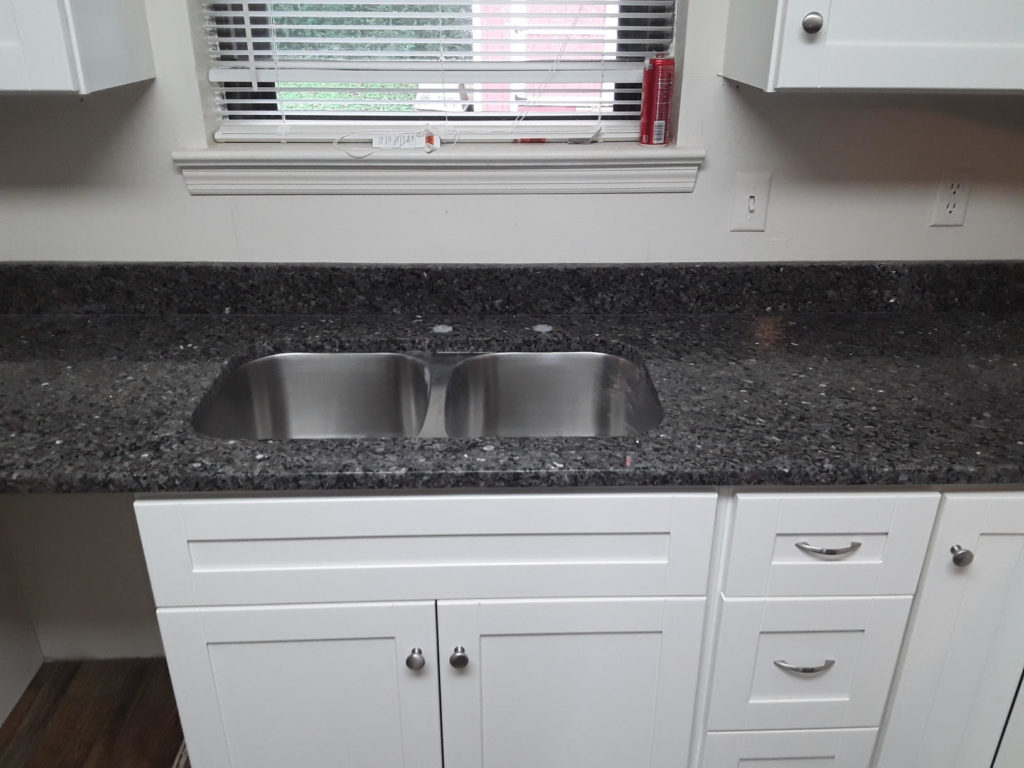
- Leveling – At this point, the countertop pieces are all brought in. The installer will ensure that everything comes together perfectly with the same overhang throughout and ensure that the pieces are leveled. To do this they should place a long and short level throughout the sections of your countertop. On the seam, they will check to ensure that there isn’t a dip in the middle between the two pieces and that it is perfectly level.
- Joints Are Glued – At this stage of your countertop installation process, the installers are now preparing your joints or seams. This usually will be done with a 2-part epoxy resin with color or a tube of epoxy made specifically for quartz countertop colors. Some installers are good at what they do and will choose not to use a seam setter in this process, but most installers do use a tool that levels and brings the two countertop pieces together for a smoother and almost invisible seam or joint. Do not be alarmed if you see an installer not using this tool. Ask to check out the result before they mix the glue. When checking the joint or seam be sure to check that is smooth and almost invisible. A good rule of thumb is 5’ away not seeing this joint or seam. Now, this is different for each material.
- Countertops Are Glued Down – Most countertop installers will use a clear silicone adhesive to lock down your countertops. This will ensure that there is no movement of smaller pieces and that you are safe from a piece falling. This is done either on the inside or outside of the cabinet face frame and ideally where the countertop meets the cabinet also. If they do not do this step, please ask that they do. At least for the smaller countertop parts.
- Best Adhesive Countertop to Wood – The best adhesive to attach your countertop to your cabinet is silicone. This will be applied to the stone around the top of your cabinet for the smaller pieces and around the front face frame edges and/or inside the cabinet carcass where the stone meets the inside.
- iBraces & Corbels – An iBrace is a bracket that supports any areas with excessive overhang. The best part is they are almost invisible and remove the knee bumping you may have with corbels. For granite or any other natural stone, this is especially important. For quartz it is still recommended but not 100% necessary. It is best to use corbels or iBraces no matter the material. You can purchase iBraces here.
- Faucet Holes Cored – After the joint or seam is glued your installer should core the holes for the faucet. This process uses a Makita Angle Grinder with a 1 – 3/8” round hole saw or core bit as it is known in the countertop industry. Most kitchens will use a single-hole faucet and a soap dispenser. Be sure to let the installer know what kind of faucet you have. They will ask otherwise. Have it readily available for them to see exactly what holes they need to saw in your countertop.
- Sinks Are Staged – Some installers mix steps number 6 and 7. It really doesn’t matter what order these two are completed, but as a professional installer myself, I like to core the holes before hanging the sink as it will prevent dust from settling on your newly glued sink. Just a quality thing from my installation experiences.
- Time to Clean Up – This is the part where everything is cleaned up. Once cleaned up take the time to run your hands across the seam or joint and check for any issues. Look for scratches, pits, or any other issues you may find. Now is the time to bring it up to the installer so that they can fix any issues you may find. Do this before they leave. A quality countertop installer will request that you look at the completed countertop installation and go over a few maintenance requirements.
An average installation should take about 2 to 3 hours to complete. There are other factors to consider when considering the time of completion. Some jobs are much harder and require a lot of in and out trips with countertop pieces. This will add time to the completed project. I have had jobs take several days due to the amount of square footage or the sheer size of the job. Cabinets being unlevel and not plumb do not help with this either.
Kitchen Countertop Overhang
A kitchen countertop overhang on the front of your cabinet should be 1 to 1.5 inches past the face frame of your cabinet. This allows for spills to bypass your drawers preventing liquid build-up.
The overhang on the open side of a countertop is typically 1 to 1.5 inches also. I always did 1 inch personally as it looks much better in my opinion. This is rarely ever discussed with a customer so if it is important to you be sure to mention it to your countertop fabricator.
Kitchen Countertop Depth
The depth of your kitchen countertop will be determined by your kitchen cabinet depth. As standard most cabinets are 24 inches deep which will give you 25.5 inches for your countertop. That allows for a 1.5-inch overhang.
Bathroom Vanity Countertop Overhang
A bathroom vanity countertop overhang on the front of the cabinet should be 1 to 1.5 inches just like a kitchen countertop mentioned above.
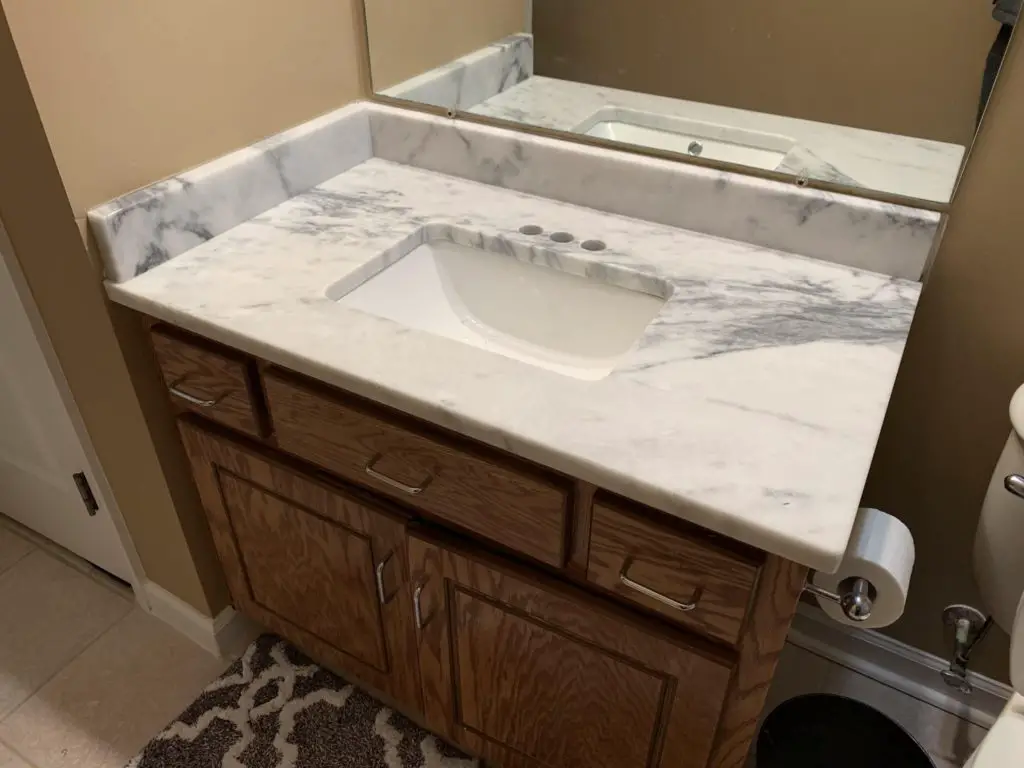
Bathroom Vanity Countertop Depth
The depth of your bathroom vanity countertop will also be determined by your vanity cabinet depth. Typically, a vanity cabinet is 21 inches in depth making your vanity countertop 22.5 inches in depth. This allows for the 1.5-inch overhang on the front of your vanity cabinet.
Conclusion
When it comes to natural stone kitchen countertop installation you should be somewhat educated on the process. This will ensure that your countertop installation will be done properly and if not you will know what to bring up to your installer.
One install step homeowners often miss: the dishwasher needs a mounting bracket because you can’t screw it into stone. My dishwasher mounting brackets guide covers it in 4 steps.
One spec to settle before fabrication: slab thickness. My guide on how thick countertops should be covers 2cm vs 3cm and which suits your project.