Wood countertops are making a comeback in kitchens around the world due to their beauty, durability, and environmental friendliness. Wood counters can be used in both traditional and modern kitchens and bathrooms. Wooden countertops pair beautifully with white cabinets, wood cabinets, and painted cabinets.
Wood Countertops Pros and Cons
When you are considering the type of countertops to install in your kitchen and bathroom, you should look for a countertop that matches your lifestyle and your home’s decor. Wood countertops have a number of advantages and disadvantages that should be considered before deciding on your new countertops.
The Pros of Wood Countertops
- Environmentally Friendly – Wood countertops can be made from reclaimed wood, or they can be made from wood sourced from forests that embrace sustainability with managed harvesting and replanting. Furthermore, if you decide you want a change your wood counters in the future, they can be recycled.
- Noise Reduction – Unlike stone countertops, wood countertops naturally absorb sound. You will notice a difference when a cup or plate is set down on the countertop. Appliance sounds will be decreased rather than amplified like they are with stone countertops.
- Inexpensive – Because wood is much easier to finish and install, most homeowners can tackle the job of installing wood countertops themselves, which can save a lot of money.
- Scratch Resistant – Wood countertops are kitchen friendly. You can cut directly on your wood counters. To reduce scratching your countertops, make sure you only use sharp knives. A dull knife requires you to press down harder during chopping. This excess pressure can increase the risk of scratching. The only way you can prevent scratches on your wood countertop is to use a cutting board when chopping.
- Heat Resistant – Many homeowners are surprised to learn that wood can handle quite a bit of heat without scorching. Pots and pans filled with items that take a long time to cool, i.e., a pan of lasagna, large pots of soup, etc. can damage your countertops. Rather than placing these items on your countertop, use a trivet to reduce the risk of heat damage.
- Refinishing – If your wood countertops become burned, stained, dented, or scratched, you can buff out the damage using sandpaper. Most stains, scratches, and burns only affect the top layer of the wood. A light sanding can remove these imperfections and bring your counters back to life.
The Cons of Wood Countertops
- Water – Wood naturally absorbs moisture. If your wood countertop is not sealed, water can seep into the wood resulting in water rings and splitting. Because wood countertops are placed in locations where there is a lot of water, it is vital that routine maintenance, including sealing, is performed to reduce the risk of water damage.
- Maintenance – Wood counters will need to be repeatedly treated with a sealant. The frequency of applying a wood countertop sealer will depend on the product that is used. However, it is vital to seal your countertops regularly, or you run the risk of your wood countertops cracking, splitting, or getting damaged due to water, stains, or scratches.
- Scratches/Dents – Although wood is durable, it can scratch or dent if you do not properly care for your wood counters. If a heavy dish or other item is dropped onto the wood countertop, it can dent the wood. Furthermore, cutting directly on your wood countertop can cause scratches.
- Refinishing – A wood countertop will begin to show wear and tear over time. Unlike other types of countertops, wood counters can be sanded down and refinished, which will restore them to their former beauty. Depending on the amount of use, countertops made from wood will need to be refinished after ten to twenty years.
Wood Countertop Grain Choices
Wood countertops can be installed by the average homeowner; however, there are things that you should know before beginning a wood countertop DIY installation. The first thing you should consider is the grain of the wood. There are three types of wood grain used in countertops – edge grain, end grain, and face grain.
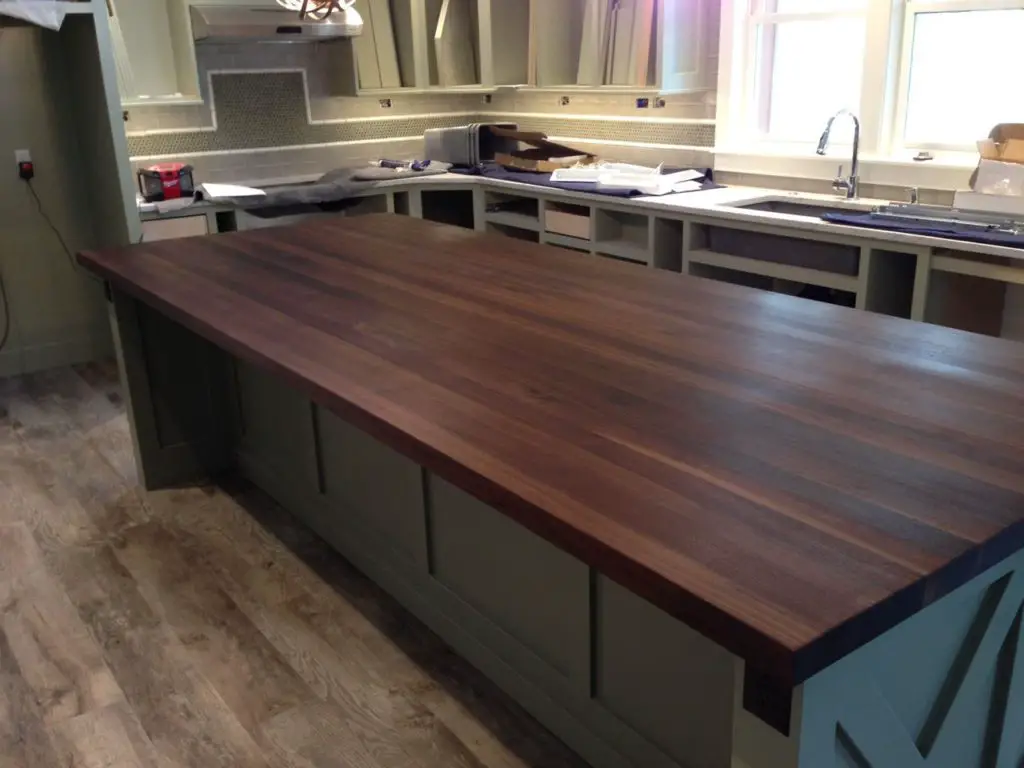
- Edge Grain – Edge grain is produced by gluing the sides of thin cut boards together. Edge grain countertops are also known as butcher block countertops. Edge grain countertops create horizontal stripes that add interest and beauty in your kitchen or bathroom.
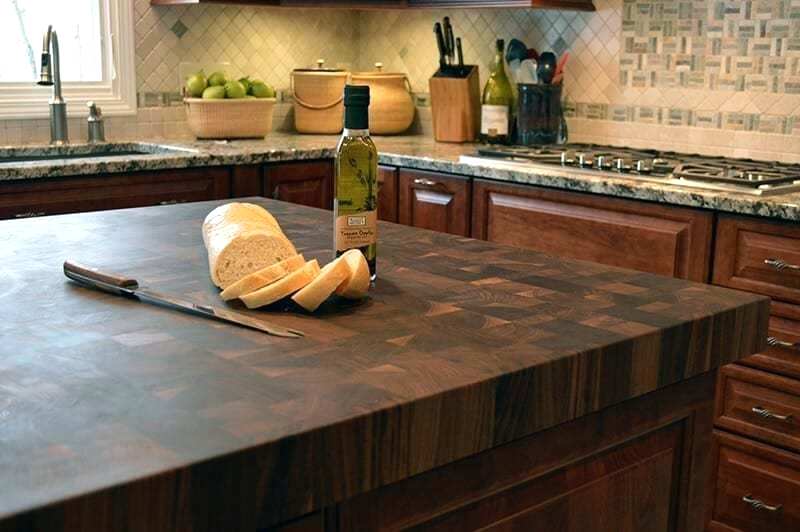
- End Grain – End grain is created by using small pieces of wood. The end grain countertop can be extremely thick, making it very durable. Edge grain creates a checkerboard pattern and is the most expensive of the three types of countertops.
- Face Grain – Face grain wood countertops create cabinetry that feels more like a piece of furniture than a cabinet and countertop. Face grain can easily be scratched, so a cutting board is always recommended. Typically, wood species with intricate grain patterns are chosen for face gain countertops.
After you have chosen the grain for your wood countertops, you must decide on the type of wood you want for your countertops.
Wood Countertop Costs and Wood Types
Wood countertops can be manufactured using several different species of wood. The species of wood used can affect the cost, frequency of maintenance and repairs, and longevity of your countertop. Let’s compare some of the different species of wood used in countertops.
- Birch – Birch is a light colored wood that has a finer grain than other types of wood. It is a softer wood and will not last as long as other types of wood countertops. Birch counters are one of the least expensive options. The average price for a birch countertop is $12 per square foot, not including installation.
- Brazilian Cherry – Brazilian cherry countertops are beautiful and revered for their uniform grain and warm red tones. This exotic wood is exceptionally durable and costs around $115 per square foot, not including installation.
- Maple – Maple countertops are affordable wood countertops featuring a light colored background with uniform grain throughout. The average cost of maple is approximately $40 per square foot, not including installation costs.
- Mesquite – Mesquite countertops are expensive; however, mesquite is one of the most durable wood countertops on the market. You can expect to pay $150 per square foot, not including installation costs for mesquite.
- Oak – Oak countertops are available in red oak and white oak. Red oak provides a rich auburn hue while white oak provides an interesting grain pattern. The average cost of oak wood countertops ranges from $15 to $30 per square foot, not including installation costs.
- Walnut – Walnut countertops provide you with deep chocolate hues with striking grain patterns. The wood is quite durable and costs around $60 per square foot, not including installation.
Wood Countertops DIY Instructions
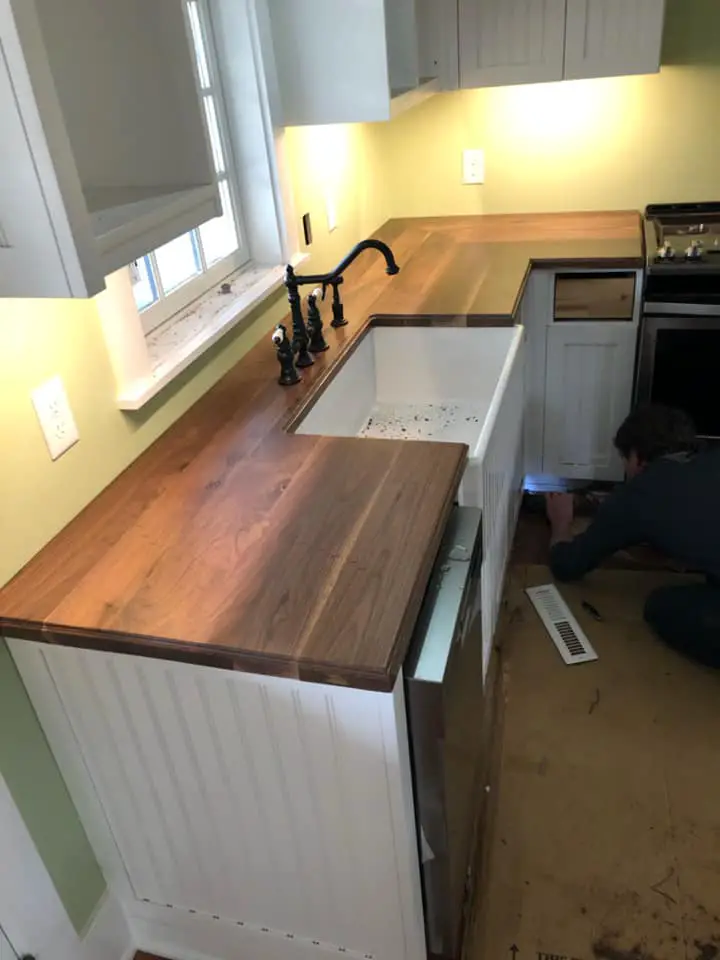
If you are comfortable with using electrical power tools, including a table saw, a jigsaw, a nailer, a drill, and a miter saw, you can install wooden countertops yourself. You must also be able to read a tape measure and make a precise template of your kitchen that includes the location of your sink and any appliances.
After you have made the template, you can remove your current countertop and donate it to a charitable organization. Using your template, cut out the opening for your appliances and your sink using a jigsaw. Use a drill to drill holes in your wood countertop for your faucet.
If two pieces of wood countertop must be joined together, fill the gap with wood putty. Allow the wood putty to dry entirely before sanding the countertop smooth. Wipe your wood countertop down to remove all traces of sawdust before applying a sealer.
Installation Costs
Although an experienced homeowner can install wood counters themselves, many choose to hire a contractor to install the countertop. On average, it will take a skilled team of countertop contractors around 10 hours to install a 100 square foot countertop. This time includes delivering the countertop and equipment, setting up, installing the countertop, and performing a thorough cleanup of the area. You should expect to pay around $700 in labor costs for wood countertops to be installed in a standard sized kitchen.
In addition to the installation costs, there will be supplies and equipment that must be used during the installation process. The supplies needed include fasteners, glue, caulk, and sealant. These supplies will add an additional $200 to your installation costs. Finally, because specialty tools like planers, routers, miter saws, pneumatic nailers, and belt sanders may be needed, you can expect an equipment allowance of $50.
How Does Wood Countertops Stack Up Against Natural Stone Countertops?
If you are contemplating installing new countertops in your kitchen or bathroom, you may wonder which type of countertop is best. Let’s look at wood countertops vs. granite vs. quartz and determine which is best for your kitchen or bathroom. Check out our Granite Vs. Quartz article if you are also considering either of the two materials.
Durability
If your family enjoys cooking, your counters are at an increased risk of scratches, water damage, and dents. Wooden countertops are not resistant to water and can scratch and burn if they are not properly sealed. However, once wood counters have been sealed, the risk of damage is minimized. Quartz countertops and granite countertops are water and scratch, resistant. However, if granite or quartz countertop is damaged, it can be challenging to repair the countertop. Wood countertops can easily be sanded and refinished to their former beauty.
Cost
The cost of wood countertops averages $50 starting price per square foot installed while the cost of granite countertops averages $30 starting price per square foot installed. Finally, the cost of quartz countertops averages $45 starting price per square foot installed.
Maintenance
Both wood and granite countertops require regular maintenance to prevent stains and water damage. Because quartz is created using adhesives, it is mostly stain resistant and nonporous; however, it is not resistant to heat. In fact, heat can damage the resin that is used to form quartz countertops. Sealing your wood countertops and granite countertops help to decrease the risk of water damage and stains.
Wood Countertop Care
The following wood countertop maintenance tips are necessary to keep your countertops looking great. Properly cleaning and sanitizing wood countertops protects against bacterial growth, mold, and germs while sealing your countertops protects against water damage and stains.
Each day you should wipe your countertops down using a clean, damp dishcloth and a drop of dish soap. Wipe the entire counter to remove all food particles. Then, use a clean wet cloth to rinse the counter. *Tip – Avoid using a household cleaner that contains bleach or ammonia because these chemicals can damage the finish of your wood countertops.
After your counters are clean, spray a germ killing solution made of four parts water and one part white vinegar. Spray the entire surface of your wood countertops and allow the mixture to set on the countertop for ten minutes. Finish by wiping away any residue using a clean, dry cloth or paper towel.
If your countertop becomes stained or develops an odor, pour table salt over the area. Cut a lemon in half. Squeeze the lemon over the salt to form a paste and rub across the stain. Allow the lemon and salt mixture to sit on the counter overnight. The next morning use warm water and rinse the counter to remove the paste. Finally, wipe the surface with a clean, wet dishcloth and allow the countertop to dry.
If your wood countertop has developed shallow scratches, you can use colored paraffin wax to fill in the scratches. Begin by rubbing the wax into the surface, pressing firmly to ensure the wax penetrates the countertop. Remove any excess wax by scraping the countertop with a plastic putty knife. Finish by buffing your wood countertop with a clean, soft cloth.
If your countertop has deep cuts or burns, you can sand the countertop with coarse sandpaper to smooth out the deep cuts and remove the burnt wood. Once you have sanded down past the burn or cuts, sand the surface using a fine grit sandpaper until the countertop is smooth. The final step is to use very fine sandpaper to buff out all sanding lines for a smooth countertop. Once the counter is smooth, you will need to re-seal your countertop.
Sealing Your Wood Countertops
Sealing your wood countertops helps protect against stains and water damage. There are four options when it comes to sealing your countertops – a food-grade oil, an oil-wax blend, a clear coat, or a waterproof finish.
No matter the sealant you use, you want to ensure you get an even coat on the top, sides, and edges of your wooden countertops.
I personally recommend using safe food grade products to ensure your health and safety.
Mineral Oil
The majority of homeowners who have wood countertops prefer using food grade mineral oil because it will never become rancid. During the first year, you will need to oil your wood counters every month. The oil soaks into the wood to condition it and prevent wood separation or splintering. Oiling increases water resistance and stain resistance. After the first year, your wooden countertops will only need to be oiled twice a year to maintain their integrity and increase its resistance to stains and water.
- Mineral Oil – Mineral oil is the conventional oil used to seal wood countertops. When searching for mineral oil to seal your wood counters, choose one that is food grade. Mineral oil produces a luxurious matte finish. You may be surprised to find that food grade mineral oil is a laxative and can be bought at your local pharmacy or big box retailer.
- Tung Oil – Tung oil creates a beautiful dark finish for your wood countertops. If you choose to use Tung oil, make sure that it is pure Tung oil; otherwise, additional chemicals that are not food safe may be used in the formula. If you have a nut oil allergy, do not use this product because it can cause a reaction.
- Linseed oil – Linseed oil is made from flax oil and brings out the natural beauty of a wood countertop. If you decide to use linseed oil, opt for raw linseed oil because boiled linseed oil may contain elements like metal that are not food safe.
- Walnut Oil – Walnut oil can be used to oil wood countertops. This oil darkens the wood slightly, producing a beautiful patina. Walnut oil should not be used in a household that has nut allergies.
- Coconut Oil – Coconut oil creates a beautiful sheen on wood countertops. In order to use coconut oil, it must be heated using a warm hairdryer. The heat from the hairdryer not only warms the oil but also helps the coconut oil soak into the wood. *Tip – Do not apply too much oil on the countertop. If too much is used, a waxy coating will for as the coconut oil cools.
Begin by cleaning the surface of your wood countertop and allow the countertop to dry completely before applying any type of oil. Once your wood counters are dry, pour a small amount of oil onto the counter and spread it across the countertop using a soft, clean cloth. Allow the oil to soak into the wood for 30 minutes and then apply a second coat. The second coat should remain on the counter for an additional 30 minutes. Finish by buffing the countertop with a soft cloth to remove any excess oil.
Oil-Wax Blends
Oil wax blends combine paraffin or beeswax with mineral oil to create a barrier against moisture. This sealant is easy to apply and produces a satin finish. You will need to apply an oil-wax blend every month during the first year and every six months the following year to fully protect your countertops. Rub the oil-wax blend into the wood countertop in the direction of the grain. Allow the oil-wax blend to sit on the counter for 20 minutes. Then, wipe the excess away and buff the countertop to a beautiful sheen.
Clear Coat
A clear coat finish is made using acrylic, resin, or urethane curing oil. This type of sealer offers fantastic protection against stains and water damage once it has fully cured. A clear coat does not require ongoing care; however, if the clear coat becomes damaged or worn, you will need to strip your wooden countertop and refinish it. A clear coat is applied using a natural bristle paintbrush. When applying a clear coat, apply with the grain, and allow to cure completely before using your countertops.
Waterproof Sealer
There is a new type of waterproof sealer called Waterlox. Waterlox is created by combining resin with Tung oil. Waterlox penetrates the wood countertop like oil and produces a waterproof seal. In addition to providing a waterproof seal, Waterlox makes your wooden countertops stain resistant and heat resistant. Many homeowners who have wood countertops say that Waterlox is the best wood countertop sealer on the market because of the protection that it offers.
You must apply multiple coats of Waterlox for a durable finish for wood countertops. When beginning the application, you want to ensure your room is well ventilated and above 60 degrees Fahrenheit. Rubber gloves, a respirator, and goggles should be worn during the application process.
Begin by preparing the surface by roughing the countertop up with 150 grit sandpaper. Once the countertop has been sanded, wipe the surface with mineral spirits to remove all traces of dirt and dust. Stir Waterlox thoroughly and apply using a natural bristle brush. Apply the product following the grain and allow it to dry 24 hours before applying the next coat. *Tip – Do not worry if the finish looks uneven after the first or second coat; this is normal. Waterlox is a self-leveling product that will build up and level out with additional coats.
Waterlox will be dry to the touch within 24 hours; however, it should not be cut on, and food should not be placed directly on the countertop until it has fully cured. The average cure time for Waterlox is 30 to 90 days, depending on the amount of ventilation, humidity levels, and temperature in your home.
Conclusion
Wood countertops offer a great way to add warmth and charm to your kitchen and bathroom. They are a great inexpensive option that works beautifully in traditional and modern homes. Performing routine cleaning, disinfecting, and sealing will ensure your wood countertops last a lifetime.